The Arduino Kitchen Timer is a simple timer based around a 10 bar LED Bar Graph, with a Piezo-Electric Buzzer. A line of 10 LED's could also be used, and each LED represents a segment of 5 mins. Once the Arduino is reset the user holds a pushbutton and the Bar Graph counts up in chunks of 5 mins, until the user lets go of the button. The timer then times 5 mins, and the last LED is turned off, etc until the timer is finished. The LED bar graph then shows a display, and a piezo buzzer sounds an alarm.

The project is made by Ari Cooper Davis
Make it:
you will need:
An Arduino

Jumper Wires

A momentary push button

A 10 Bar LED Bar Graph or 10 Normal red Leds

A Piezoelectric Buzzer

A 10k resistor

Now build the circuit

And here is the Code
Read more »
The project is made by Ari Cooper Davis
Make it:
you will need:
An Arduino
Jumper Wires
A momentary push button
A 10 Bar LED Bar Graph or 10 Normal red Leds
A Piezoelectric Buzzer
A 10k resistor
Now build the circuit
And here is the Code
/*
Kitchen_Timer
Counts up LED's on a bar graph to indicate 5 minute icrements being added to
a timer circuit. A button is held to count up the LED's, and when the timer
finishes the Bar Graph shows a graphic, and a piezo-electric buzzer sounds.
The circuit:
* LED bar graph attached from pins (13-3 excluding 9) to ground
* pushbutton attached to pin 2 from +5V
* 10K resistor attached to pin 2 from ground
* piezo buzzer attached to pin 9 from ground
* Note: I recommend doing this on an arduino shield, as this requires a good
amount of wire jumpers.
Created in 2011 ©
by Ari Cooper Davis [anonymouse197@gmail.com]
http://www.instructables.com/member/anonymouse197/
*/
// constants (const) won't change. They're used here to set pin numbers:
const int buttonPin = 2; // the number of the pushbutton pin
const int ledPin = 13; // the number of the 1st LED pin
const int led2Pin = 12; // the number of the 2nd LED pin
const int led3Pin = 11; // the number of the 3rd LED pin
const int led4Pin = 10; // the number of the 4th LED pin
const int led5Pin = 8; // the number of the 5th LED pin
const int led6Pin = 7; // the number of the 6th LED pin
const int led7Pin = 6; // the number of the 7th LED pin
const int led8Pin = 5; // the number of the 8th LED pin
const int led9Pin = 4; // the number of the 9th LED pin
const int led10Pin = 3; // the number of the 10th LED pin
const int speakerOut = 9;
// variables will change. They're used mostly for functions:
int buttonState = 0; // variable for reading the pushbutton status
int tastyTimeVariable = 0; // variable for defining time to wait
int iVariable = 0; // variable for repeating display alarm
int tVariable = 0; // variable for repeating piezo alarm
void setup() {
// initialize the LED pins as output pins:
pinMode(ledPin, OUTPUT);
pinMode(led2Pin, OUTPUT);
pinMode(led3Pin, OUTPUT);
pinMode(led4Pin, OUTPUT);
pinMode(led5Pin, OUTPUT);
pinMode(led6Pin, OUTPUT);
pinMode(led7Pin, OUTPUT);
pinMode(led8Pin, OUTPUT);
pinMode(led9Pin, OUTPUT);
pinMode(led10Pin, OUTPUT);
// initialize the pushbutton pin as an input:
pinMode(buttonPin, INPUT);
// initialize the piezo pin as an output
pinMode(speakerOut, OUTPUT);
delay(1000);
}
void loop(){
// read the state of the pushbutton value:
buttonState = digitalRead(buttonPin);
// check if the pushbutton is pressed. if it is, the buttonState is HIGH:
if (buttonState == HIGH) {
// add to timer
++tastyTimeVariable;
digitalWrite(ledPin, HIGH);
}
else {
}
delay(1000); // a second delay for adding time increments
buttonState = digitalRead(buttonPin);
if (buttonState == HIGH) {
// add to timer
++tastyTimeVariable;
digitalWrite(led2Pin, HIGH);
}
else {
}
delay(1000);
buttonState = digitalRead(buttonPin);
if (buttonState == HIGH) {
// add to timer
++tastyTimeVariable;
digitalWrite(led3Pin, HIGH);
}
else {
}
delay(1000);
buttonState = digitalRead(buttonPin);
if (buttonState == HIGH) {
// add to timer
++tastyTimeVariable;
digitalWrite(led4Pin, HIGH);
}
else {
}
delay(1000);
buttonState = digitalRead(buttonPin);
if (buttonState == HIGH) {
// add to timer
++tastyTimeVariable;
digitalWrite(led5Pin, HIGH);
}
else {
}
delay(1000);
buttonState = digitalRead(buttonPin);
if (buttonState == HIGH) {
// add to timer
++tastyTimeVariable;
digitalWrite(led6Pin, HIGH);
}
else {
}
delay(1000);
buttonState = digitalRead(buttonPin);
if (buttonState == HIGH) {
// add to timer
++tastyTimeVariable;
digitalWrite(led7Pin, HIGH);
}
else {
}
delay(1000);
buttonState = digitalRead(buttonPin);
if (buttonState == HIGH) {
// add to timer
++tastyTimeVariable;
digitalWrite(led8Pin, HIGH);
}
else {
}
delay(1000);
buttonState = digitalRead(buttonPin);
if (buttonState == HIGH) {
// add to timer
++tastyTimeVariable;
digitalWrite(led9Pin, HIGH);
}
else {
}
delay(1000);
buttonState = digitalRead(buttonPin);
if (buttonState == HIGH) {
// add to timer
++tastyTimeVariable;
digitalWrite(led10Pin, HIGH);
}
else {
}
// The above code runs to add 1 to the tastyTimeVariable if the button is
// pressed, so that the arduino knows how long it should time for.
delay(1000);
digitalWrite(led10Pin, LOW);
digitalWrite(led9Pin, LOW);
digitalWrite(led8Pin, LOW);
digitalWrite(led7Pin, LOW);
digitalWrite(led6Pin, LOW);
digitalWrite(led5Pin, LOW);
digitalWrite(led4Pin, LOW);
digitalWrite(led3Pin, LOW);
digitalWrite(led2Pin, LOW);
digitalWrite(ledPin, LOW);
delay(1000);
// The above code turns all LED's off, so as to make sure they do not
// interfere later on in the coding.
if (tastyTimeVariable == 0) {
}
else if (tastyTimeVariable == 1) {
digitalWrite (ledPin, HIGH);
delay(300L * 1000L); // 5 minutes. This can be changed to change increments
}
else if (tastyTimeVariable == 2) {
digitalWrite (led2Pin, HIGH);
digitalWrite (ledPin, HIGH);
delay(300L * 1000L);
digitalWrite (led2Pin, LOW);
delay(300L * 1000L);
}
else if (tastyTimeVariable == 3) {
digitalWrite (led3Pin, HIGH);
digitalWrite (led2Pin, HIGH);
digitalWrite (ledPin, HIGH);
delay(300L * 1000L);
digitalWrite (led3Pin, LOW);
delay(300L * 1000L);
digitalWrite (led2Pin, LOW);
delay(300L * 1000L);
}
else if (tastyTimeVariable == 4) {
digitalWrite (led4Pin, HIGH);
digitalWrite (led3Pin, HIGH);
digitalWrite (led2Pin, HIGH);
digitalWrite (ledPin, HIGH);
delay(300L * 1000L);
digitalWrite (led4Pin, LOW);
delay(300L * 1000L);
digitalWrite (led3Pin, LOW);
delay(300L * 1000L);
digitalWrite (led2Pin, LOW);
delay(300L * 1000L);
}
else if (tastyTimeVariable == 5) {
digitalWrite (led5Pin, HIGH);
digitalWrite (led4Pin, HIGH);
digitalWrite (led3Pin, HIGH);
digitalWrite (led2Pin, HIGH);
digitalWrite (ledPin, HIGH);
delay(300L * 1000L);
digitalWrite (led5Pin, LOW);
delay(300L * 1000L);
digitalWrite (led4Pin, LOW);
delay(300L * 1000L);
digitalWrite (led3Pin, LOW);
delay(300L * 1000L);
digitalWrite (led2Pin, LOW);
delay(300L * 1000L);
}
else if (tastyTimeVariable == 6) {
digitalWrite (led6Pin, HIGH);
digitalWrite (led5Pin, HIGH);
digitalWrite (led4Pin, HIGH);
digitalWrite (led3Pin, HIGH);
digitalWrite (led2Pin, HIGH);
digitalWrite (ledPin, HIGH);
delay(300L * 1000L);
digitalWrite (led6Pin, LOW);
delay(300L * 1000L);
digitalWrite (led5Pin, LOW);
delay(300L * 1000L);
digitalWrite (led4Pin, LOW);
delay(300L * 1000L);
digitalWrite (led3Pin, LOW);
delay(300L * 1000L);
digitalWrite (led2Pin, LOW);
delay(300L * 1000L);
}
else if (tastyTimeVariable == 7) {
digitalWrite (led7Pin, HIGH);
digitalWrite (led6Pin, HIGH);
digitalWrite (led5Pin, HIGH);
digitalWrite (led4Pin, HIGH);
digitalWrite (led3Pin, HIGH);
digitalWrite (led2Pin, HIGH);
digitalWrite (ledPin, HIGH);
delay(300L * 1000L);
digitalWrite (led7Pin, LOW);
delay(300L * 1000L);
digitalWrite (led6Pin, LOW);
delay(300L * 1000L);
digitalWrite (led5Pin, LOW);
delay(300L * 1000L);
digitalWrite (led4Pin, LOW);
delay(300L * 1000L);
digitalWrite (led3Pin, LOW);
delay(300L * 1000L);
digitalWrite (led2Pin, LOW);
delay(300L * 1000L);
}
else if (tastyTimeVariable == 8) {
digitalWrite (led8Pin, HIGH);
digitalWrite (led7Pin, HIGH);
digitalWrite (led6Pin, HIGH);
digitalWrite (led5Pin, HIGH);
digitalWrite (led4Pin, HIGH);
digitalWrite (led3Pin, HIGH);
digitalWrite (led2Pin, HIGH);
digitalWrite (ledPin, HIGH);
delay(300L * 1000L);
digitalWrite (led8Pin, LOW);
delay(300L * 1000L);
digitalWrite (led7Pin, LOW);
delay(300L * 1000L);
digitalWrite (led6Pin, LOW);
delay(300L * 1000L);
digitalWrite (led5Pin, LOW);
delay(300L * 1000L);
digitalWrite (led4Pin, LOW);
delay(300L * 1000L);
digitalWrite (led3Pin, LOW);
delay(300L * 1000L);
digitalWrite (led2Pin, LOW);
delay(300L * 1000L);
}
else if (tastyTimeVariable == 9) {
digitalWrite (led9Pin, HIGH);
digitalWrite (led8Pin, HIGH);
digitalWrite (led7Pin, HIGH);
digitalWrite (led6Pin, HIGH);
digitalWrite (led5Pin, HIGH);
digitalWrite (led4Pin, HIGH);
digitalWrite (led3Pin, HIGH);
digitalWrite (led2Pin, HIGH);
digitalWrite (ledPin, HIGH);
delay(300L * 1000L);
digitalWrite (led9Pin, LOW);
delay(300L * 1000L);
digitalWrite (led8Pin, LOW);
delay(300L * 1000L);
digitalWrite (led7Pin, LOW);
delay(300L * 1000L);
digitalWrite (led6Pin, LOW);
delay(300L * 1000L);
digitalWrite (led5Pin, LOW);
delay(300L * 1000L);
digitalWrite (led4Pin, LOW);
delay(300L * 1000L);
digitalWrite (led3Pin, LOW);
delay(300L * 1000L);
digitalWrite (led2Pin, LOW);
delay(300L * 1000L);
}
else if (tastyTimeVariable == 10) {
digitalWrite (led10Pin, HIGH);
digitalWrite (led9Pin, HIGH);
digitalWrite (led8Pin, HIGH);
digitalWrite (led7Pin, HIGH);
digitalWrite (led6Pin, HIGH);
digitalWrite (led5Pin, HIGH);
digitalWrite (led4Pin, HIGH);
digitalWrite (led3Pin, HIGH);
digitalWrite (led2Pin, HIGH);
digitalWrite (ledPin, HIGH);
delay(300L * 1000L);
digitalWrite (led10Pin, LOW);
delay(300L * 1000L);
digitalWrite (led9Pin, LOW);
delay(300L * 1000L);
digitalWrite (led8Pin, LOW);
delay(300L * 1000L);
digitalWrite (led7Pin, LOW);
delay(300L * 1000L);
digitalWrite (led6Pin, LOW);
delay(300L * 1000L);
digitalWrite (led5Pin, LOW);
delay(300L * 1000L);
digitalWrite (led4Pin, LOW);
delay(300L * 1000L);
digitalWrite (led3Pin, LOW);
delay(300L * 1000L);
digitalWrite (led2Pin, LOW);
delay(300L * 1000L);
}
else if (tastyTimeVariable > 10) {
}
if (tastyTimeVariable == 0) {
}
else {
for(int iVariable = 0; iVariable < 1000; iVariable++) { // alarm length
digitalWrite(ledPin, HIGH);
delay(100);
digitalWrite(led2Pin, HIGH);
delay(100);
digitalWrite(led3Pin, HIGH);
digitalWrite(ledPin, LOW);
delay(100);
digitalWrite(led4Pin, HIGH);
digitalWrite(led2Pin, LOW);
delay(100);
digitalWrite(led5Pin, HIGH);
digitalWrite(led3Pin, LOW);
delay(100);
digitalWrite(led6Pin, HIGH);
digitalWrite(led4Pin, LOW);
delay(100);
digitalWrite(led7Pin, HIGH);
digitalWrite(led5Pin, LOW);
delay(100);
digitalWrite(led8Pin, HIGH);
digitalWrite(led6Pin, LOW);
delay(100);
digitalWrite(led9Pin, HIGH);
digitalWrite(led7Pin, LOW);
delay(100);
digitalWrite(led10Pin, HIGH);
digitalWrite(led8Pin, LOW);
delay(100);
digitalWrite(led9Pin, LOW);
delay(100);
digitalWrite(led10Pin, LOW);
delay(400);
// The above code creates a loading bar effect with the LED's
for(int tVariable = 0; tVariable < 5; tVariable++) { // another loop function
analogWrite(speakerOut, 150);
delay(50);
analogWrite(speakerOut, 0);
delay(50);
analogWrite(speakerOut, 5);
delay(50);
analogWrite(speakerOut, 0);
delay(50);
}
// The above code creates a buzzer noise alarm
}
}
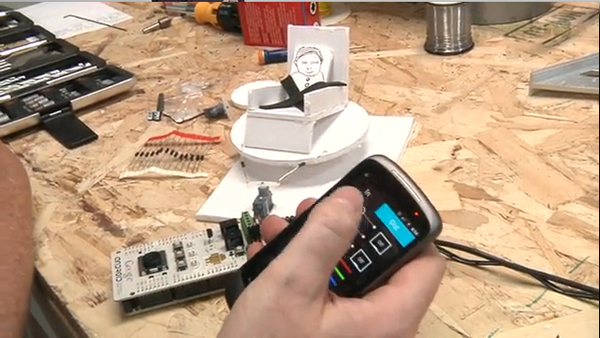
}And at last the proof Video


0 Comments
Tags:
Arduino projects